Showing posts with label before/after. Show all posts

Monday, August 29, 2011

New TV Stand

We finally upgraded our old TV stand. Not even on purpose. I have been wanting an entertainment center but couldn't afford one just now. Then we were driving home from the grocery store one day and saw one on the side of the road for $25. It was in really good condition. I don't normally like light wood but for $25, I really don't care.

Here is what we have had since college.


Yes, those are those plastic shelves you put together. I made curtains to cover it and make it look a little better.

Here is our new TV home.


Such a big improvement.

Tuesday, April 12, 2011

Small Steps

Well, the snow has finally melted. But now it is raining. Maybe eventually we will get to rake the yard and start on all that yard work.

So between the snow and rain and the fact we seem to be busy every weekend, we haven't gotten much done. The one thing we have done is replace the floor heating grate in the kitchen.

Someone put a wall grate in the floor. And since the size used is not one that they make in floor grates, we had to get creative.

Here is the old grate and why we needed to replace it. And yes, someone stepped on it. That is why it looks like that.


Here is the new one.


Because it is smaller, we had to put a piece on wood behind it so it would fit. I may eventually paint it. I may not. For now, I'm just glad there is a working, safe to walk on and near, floor grate.

Friday, August 27, 2010

A Closet and A Hallway and A Standstill

A couple of Fridays ago, I was randomly bored so I decided to paint the bathroom closet. I could describe to you just how awful it was but in this case, pictures can speak a thousand words.


Awful, isn't it? What worse? Look at what came out of it. And this isn't even everything.


After a coat of (yet more) leftover bedroom paint, it now looks like this:


Please excuse the awful shelf paper job. We had just moved in and I was exhausted when I did it.


Also tackled recently was the tearing down of the the paneling in the hallway. Here it what it used to look like:

Here is what it looks like without the dark, fake wood paneling:

I'm not going to be able to paint it right away like planned though. We have decided to replace the drywall. It was put up with nails instead of screws and they have started to pop. Plus, most the seams looks like this:


But, until I can get a job, we can't afford to buy the new drywall.

We have also run into a couple other problems. We decided to do the guest room as well but the center wall sinks. So we need to go into the basement and jack up the wall before we start any drywall anyway. So, we are at a standstill until we can afford to do more work.

I am, however, still doing all the prep work. Next week I will begin to tear up the carpeting in the guest room and in the hallway. And I will need to rearrange things in the new guest bedroom (the third bedroom in the basement we usually use more for storage) so that we can get to where we need to put the floor jack. We had to take everything out of the second bedroom and put it in the third bedroom. Except for the desk which we put in the living room.

Everything is pretty much in upheaval but that is what happens when you live in a fixer-upper. :)

Thursday, August 12, 2010

A Nightstand and a Fan Makeover

Well, so I haven't been as busy as planned recently. I had a wedding that I was in plus some job interviews then recovering from wedding/woodsmen weekend. So not much really happened. The good news....I have a job starting the end of the month. I will be in my field (Ed Tech). It is only part-time and it is about 45-50 minutes away but I am still very excited. Finally going in the direction that I want to be.

So anyway, I did, after much hassle, finally stain my nightstand. I got distracted and forgot to wipe off the excess stain so four days later it was still not dry. So I had to apply another coat, let it sit about 5-10 minutes which reactivated the previous stain, then wiped it all off. Of course, then I had to sand and stain again. But I did it right this time! Of course, had to have a week worth of frustration and almost permanently brown nail beds. (Always wear gloves when staining) :) It's about 1.5 shades darker than before. I would have gone a little darker but I was very sick of staining. (Pardon the slight off shade picture. Used my cheap camera not my good one).


Then I saw on My Repurposed Life how to paint a ceiling fan. Well, I have an old brass and fake wood grain ceiling fan in the dining section of my kitchen. I kept saying all winter that I wanted to get rid of it and put in a new light. Then summer hit and I realized that fan is handy. But it was still ugly. So I am painting it as we speak. Well, technically not right now as I am not quite that talented. But it is drying. Here are some things I have learned while painting this fan.

- The wiring in our house is old so I did not dare take the motor down. So I had to paint the section that holds the lightbulb with it still attached to the ceiling. Spraying spray paint into a tin can then using a paintbrush to apply is not ideal but it is easier than dealing with wiring.

-Spray black spray paint on the blade then let dry some. Then spray brown over it. Before it is dry, drag a new nylon scrub brush up the blade to create a wood grain. Looks a bit better than just a flat brown. You can kind of see it in this picture. Does look much better actually up on the ceiling than up close.


-The refrigerator is on the same circuit of the light even though it says it is not. Part of the reason I didn't deal with wiring.

The tutorial I read painted the whole fan white. I don't mind that look but it doesn't fit in with my decor. I decided if you can do it all white, why not do the metal silver and the blades brown?

Anyway, here is the before. Isn't it lovely?


And here is the after: (many hours after I originally started this post)


Next week's project will be to paint over the dark paneling in the hallway....or tear it down and paint the drywall behind it.

Wednesday, July 14, 2010

Pictures Finally

The pictures I promised have arrived!! I finally have time. Those of you that read my personal blog, know that I lost my job on Friday. As the jobs I am trying to get do not start until fall, I have the time now to get stuff done.

Without further ado, here are the after pictures (because yet once again I forgot the before pictures).


My guest room also has to act as an office, craft storage, and book storage. So to keep the look a little better, I replaced the plastic drawers that were next to the desk with a basket and 2 boxes from the stationary section of Wal-Mart.


We also needed a place for books. The black bookcase next to the desk is getting sold. I have too many books for it and it is just a standard issue Wal-Mart one. My husband's grandmother's house got sold and had to be cleaned out. There were two bookcases that were almost the same size. So my husband cut the bottom off of one, put it on top of the other, and screwed them together. The bottom one has a piece of thin plywood attached to the back to make it more stable. I then painted the whole thing white. Works pretty good for now.


This room will eventually be the nursery and will look nothing like this. The carpet is gross and the wallpaper is out of date and peeling. The guest bedroom will eventually be downstairs and will be white and lilac. The nursery will be pale yellow and pale green (baby John Deere if you will, and if you know my husband, it makes sense).

Sunday, June 6, 2010

Painting and Flooring

Yesterday my mom and dad were down so that Dad could help/teach Matt with the roofing project. Long story short, someone cut the trusses to make an attic space (that we will not be using) and did not fix it so that the roof had support. So while they were done Mom and I randomly decided to paint the bathroom cabinet. I do not have a before pictures of it as I didn't think that far ahead. But they looked exactly like the kitchen cabinets except for different hardware and had a coat of poly on them. So here is the "before:"


And after:


Then today after being lazy most the day I decided it was time to paint the hall closet finally.


Before:


After:


And why stop there? We had left over vinyl tile from the bathroom floor project so I decided to do the floor too. But of course, forgot a before pic so here is the best I could do. I need to get better and the whole before thing.

Before:


After:


Next weekend I am driving a couple hours to help host a bridal shower for a friend. So I probably won't be able to do any home projects. It might be a couple weeks before I am able to post something new. Hopefully not but I'm still around even if you don't hear from me for a few weeks. :)

Tuesday, June 1, 2010

Inspiration: Gift Wrap Organization/Center

Like most people, my gift wrap is just out of control. I had a plastic container to hold the tissue paper and small gift bags. My paper rolls and larger bags were just sitting in a milk crate. The main problem with that being that every time I moved the crate, all the paper rolls fell through the bottom. Talk about a pain. So when I saw this, I just new I had to try it. Here's a peek.


So I went into Wal-Mart today in the hopes of finding what I needed. I was unable to find any wire baskets that would work for what I needed. So after much wondering around I ended up in the bath aisle of the hardware department. I found plastic shower caddies that suction cup to the shower wall. I took out the suction cups and used Hercules Hooks to attach them to the wall. Here is my before and after.


Here is what it looks like after.


Here's a close up of the basket.


I used two cup hooks and some ribbon to help hold the wrapping paper up.


So there you have it. Basic idea. I definitely like the wire baskets better but it works with the plastic caddies as well. I do still have the issue of what I do with the larger gift bags. If you have an idea for how to handle it, I'd love to hear from you. Go ahead and leave a comment!

Thank you John and Sherry over at Young House Love for the inspiration.

Monday, May 31, 2010

Before/After So Far

Bathroom floor before (hard to see but dark blue carpeting on the floor):

Bathroom floor after (peel and stick vinyl tiles for now):


Dishwasher before( didn't actually clean the dishes):


Dishwasher after (brand new in the box from Craigslist $200):


Kitchen faucet before:


Kitchen faucet after:


Bedroom before (ugly pink beige):


Bedroom after:


Living room after (no before pic but there was no light fixture before):


There are a few more random ones that I will share when they are more done. We are currently working on putting white rock up against the house. We have some under the hose and dryer vent right now(mainly to keep a snakes away. long story).

Welcome to Our Old Home!

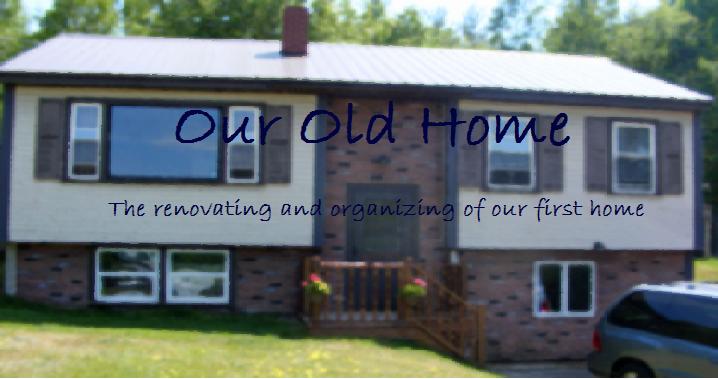
December 2nd, 2009 we (my husband Matt and I) bought our first home. Not just any home. We bought an old home(1969 to be exact) that is in need of some help. The bones are good and solid. It is just full of tiled ceilings and fake wood paneling and ugly, worn out beige carpeting and 1970's yellow shower and sink. My goal for this blog is to show before and after pictures of the renovations, organizations, and decorations. We'll see how I do. :) So, without further ado, here is our "new" home.
Here's the the front of our home. The only real difference is some hanging baskets on the front porch and side deck.

Enter the before and after pictures!

Front door before:


Front door after:


I'll finish the rest of the before/after pictures later but right now it is time for breakfast and I'm hungry. :)